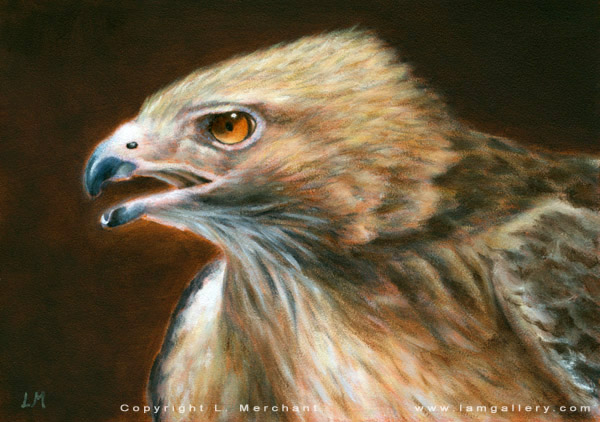
Hawk
Oils, 5x7, 2007
|
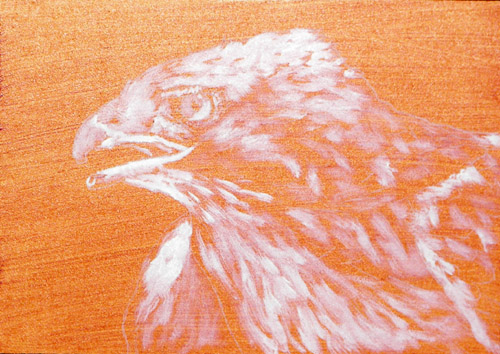
In the interests of doing a true WIP, here's the first of the
ugly stages. I had pre-prepped the board with burnt sienna a while back, and
this first stage I just used titanium white to sketch in highlights and areas
that will be more opaque later, including the eyes.
I worked pretty quickly, sketching the feathers fast and loose. I'm not worried about making it pretty yet, as this is just the framework for the later painting. I'll have to
wait a few days for the white to dry before I add more.
|
|
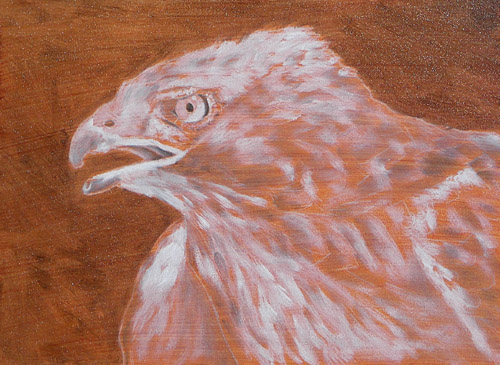
Here I've started to block in the shadows using payne's grey. I've also put down the first layer of the background, using a mix of burnt umber, french ultramarine, and payne's grey.
|
|
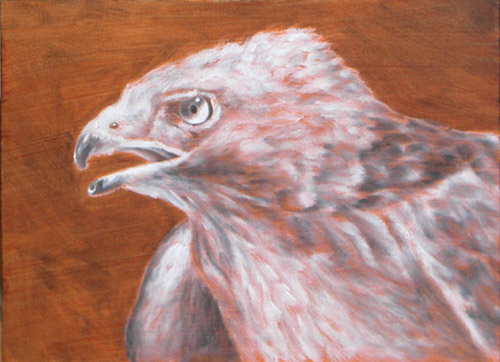
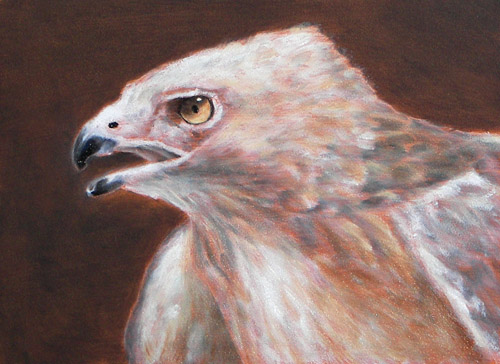
Here, I'm continuing to flesh out the values on this. I'm focusing on the values because if that's not correct, the final piece won't look as real. As you can see, even though I've only painted in white and grey so far, the orange shows through to give it the appearance of already having some color.
|
|
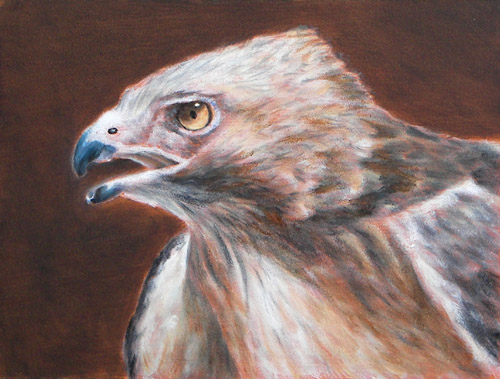
With this glazing technique, the formula is several short sessions. This is about 30-45 minutes more work than the last picture, but now I need to wait until it dries to add more.
I glazed on some naples yellow onto the feathers, as well as more white in places and some burnt sienna to add the reddish hue. The trick with white is that it dries more transparent than when it went on, so if a white area sits and dries, it may need to be added to later, to get a brighter white.
For the beak, I used some french ultramarine and black. The eye I glazed with naples yellow and then lightly went over with burnt sienna. It is essential to build up the eye in many light glazes to give the effect of light passing through to the underlying colors. I may yet add another layer of burnt sienna in certain areas to deepen the eye even further.
The trick to realism is to have a full range of values or contrasts, from white to black, and that's what I will be focusing on in the next few sessions. I will also continue to layer the feathers as I go.
|
|
Here, I'm continuing to darken the feathers of the hawk. I'm using payne's grey for the darks, which has a slight blue color to it. I'm applying the feathers with the side of a small comb brush, as the head feathers are mostly long and thin. I also add some feathers using burnt sienna.
I also applied some cerulean blue to the beak.
|
|
Here's a bit more completed. I worked on the white neck feathers and continued to build up the feathers all around. I also added a layer of burnt sienna to the eye, and may yet add even more when this layer dries. I also fleshed out the beak a bit more.
|
|
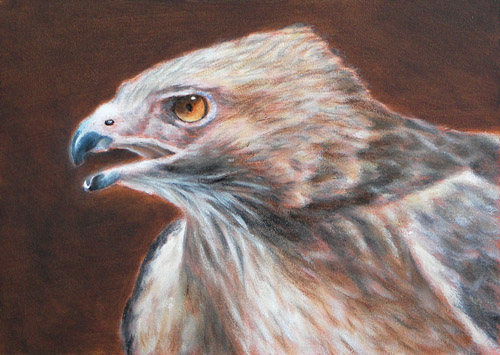
I darkened the areas of shadow in the body feathers, and cleaned up the wing. I also added another layer of dark to the background.
|
|
|